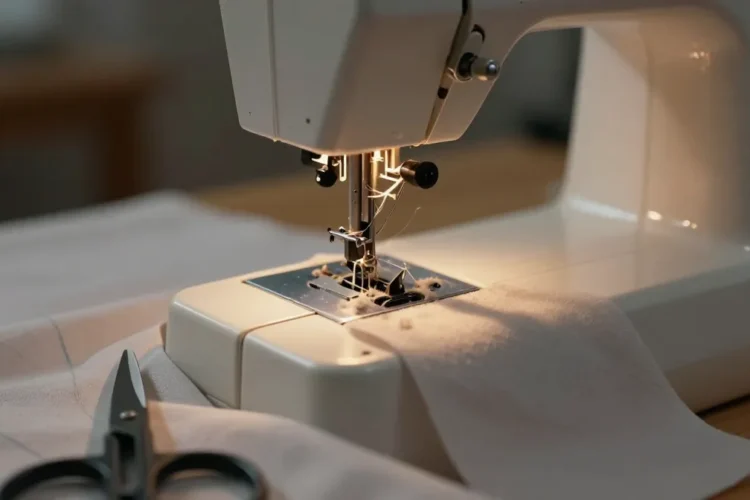
Want to know why your sewing machine keeps jamming and how to fix it fast? You’re not alone. We’ve all wrestled with snarled threads and a bobbin that acts like a grumpy toddler. The good news: most jams aren’t rocket science. With a few quick checks and a calm mindset, you’ll be stitching happily again in no time.
Common culprits behind a jammy machine
– Thread tension drama: Too tight, too loose, or just inconsistent tension can cause threads to snag or pile up under the fabric. The result? a useless knot parade at the needle.
– Dirty machine, dirty thoughts included: Lint, dust, and stray thread bits love to hide in the bobbin area, feed dogs, and tension disks. They slow you down and cause skipped stitches or jams.
– Bobbin ballet gone wrong: If the bobbin isn’t wound evenly, seated correctly, or inserted the wrong way, you’ll meet resistance at every stitch.
– Needle issues: Dull, bent, or wrong-sized needles for the fabric can drag, skip, or poke through thread. Plus, a bent needle can jam the whole party.
– Fabric and stitch mismatch: Heavy fabrics with lightweight threads, or thick seams in a delicate fabric, can pile up and jam. The needle just can’t keep up.
– Thread path got messy: A tangled thread path, especially with multi-thread surges, invites knots and jams.
First-aid prep: quick checks before you dive in
– Unplug and take a breath: No surprises while you work. Safety first, drama second.
– Gather your tools: Small scissors, tweezers, a seam ripper, a lint brush, and an owner’s manual or quick-reference guide if you’ve got one.
– Clear the area: A clean, roomy workspace makes the jam-fix feel less like a treasure hunt and more like a spa treatment for your machine.
– Label your parts: If you’re new to the layout, a quick mental map or tiny notes helps you reassemble faster.
How to fix the most common jams
- Check the needle first:
– Remove the needle and inspect the tip. If it’s bent or dull, replace it with a new one in the same size and type for your fabric.
– Make sure the needle is inserted all the way up, with the flat side facing the correct direction (varies by model, but usually flat toward the back).
– Reinsert and test with a scrap piece. - Rewind and reseat the bobbin:
– Take out the bobbin and wind a fresh bobbin if yours looks off-kilter or underfilled.
– Check the bobbin case for lint and lint-y residues. Clean gently with a small brush.
– Reinsert the bobbin, ensuring it unwinds counterclockwise (or as your manual specifies) and that it sits snugly in the case. - Clear the lint tunnels:
– Open the bobbin area and pull out any stubborn threads with tweezers.
– Vacuum or brush out lint from feed dogs and surrounding area. Don’t go overboard—just enough to clear the junk. - Recheck thread path and tension:
– Rethread the machine from the needle to the spool, ensuring threads sit properly in guides.
– Check top thread tension with a simple test: hold both threads with a light tug; the thread should pull smoothly and not slip out.
– Adjust tension in small increments if needed. Remember: big changes equal big headaches. - Fabric-savvy stitch test:
– Try a straight stitch on scrap fabric similar to your project.
– If it sews fine, gradually switch to a zigzag or decorative stitch to test the tension across modes.
Specific jams and how to tame them
Bobbin thread snarls that steal the show
– Cause: The bobbin thread is pulled in the wrong direction or caught on a hook.
– Fix:
– Remove fabric, lift presser foot, and gently pull the bobbin thread to reveal any snarls.
– Rewind and reinsert the bobbin, making sure the thread unwinds in the correct direction.
– If the bobbin case is loose, snug it up to the right tension so it doesn’t drag.
Skipping stitches: not a fashion statement
– Cause: Needle alignment, bent needle, or fabric too thick for the needle.
– Fix:
– Replace with the correct needle size for the fabric.
– Re-thread both top and bobbin threads; ensure no loose ends are tucked under the presser foot.
– Slow down your stitch speed while you work through the fabric.
Fabric pulling and puckering
– Cause: Tension mismatch between top and bobbin, or wrong needle for fabric weight.
– Fix:
– Match needle type to fabric: jersey needs ballpoint; denim needs sharp contrast.
– Try a slightly longer stitch length for heavy fabrics to avoid gathering or pucker.
Metal or plastic noise: is something broken?
– Cause: Loose screws, obstructions, or a mis-threaded path.
– Fix:
– Check for loose screws on the needle plate, presser foot, and tension discs.
– Look for anything obstructing the feed dogs or moving parts. Remove gently.
Machine won’t stitch at all
– Cause: Power, foot pedal, or switch issues; or jammed in transport mode.
– Fix:
– Verify the power switch and foot pedal are functioning.
– Reset the machine if it has a reset option, or unplug and replug after a minute.
– Ensure the presser foot is lowered when stitching; some machines won’t engage if it’s up.
Tips and tricks from the pros
– Use the right needle and thread combo: Thin fabrics love small, sharp needles; thick fabrics need sturdier needles and thicker thread.
– Clean regularly, but don’t overdo the disassembly: A quick lint sweep after every project saves headaches.
– Lint is the enemy of speed: Keep a dedicated bottle of compressed air or a soft brush handy (FYI, never use compressed air on electronics—only on the mechanicals where recommended).
– Build a quick ritual: Thread, test, stitch, and then check. It becomes muscle memory and saves time.
– Save your settings: If your machine lets you memorize stitch settings, write down or memorize the exact tension settings you used for different fabrics.
Common Questions
Why does my thread keep bunching under the fabric?
Most often it’s tension-related or a misthreaded path. Rethread both top and bobbin carefully, test on scrap, and adjust tension in small steps. Make sure you’re using the correct needle and thread for the fabric weight.
How often should I clean my machine?
Give it a quick lint sweep after each project and a deeper clean every few months, depending on usage. If you sew a lot with heavy fabrics, clean more often—lint loves to nest in the bobbin area.
What if the needle is fine but stitches still look off?
Check the bobbin tension and top thread tension. Make sure the needle is the right type for your fabric, and that the bobbin is correctly seated. A skipped stitch often means one of these is off.
My machine won’t sew, even though it’s plugged in and new thread is loaded. What now?
Look for a jam or a switch that’s engaged. Check the presser foot position and ensure it’s lowered. If nothing seems to be wrong, power down, unplug, wait a moment, and restart. Sometimes machines panic and need a reset.
Conclusion
Sewing machine jams are annoying, yes, but rarely mysterious. Most fixes come down to a little routine maintenance, the right needle and thread for the job, and patiently retracing the thread path. FYI, once you erase the lint demons from the bobbin area and straighten out tension, you’ll get a smoother ride than a well-oiled sewing room. So grab your tweezers, a scrap fabric, and that ever-so-helpful manual, and show that machine who’s boss. You’ve got this.
0 Comments