I get it. Sewing straight feels like magic some days, science other days. You want clean seams without zig-zagging into the land of sideways spaghetti. Let’s cut to the chase and get you stitching like a pro—without needing a degree in geometry.
Start with the right mindset
Before you even lift the needle, a few tiny shifts make a world of difference. Your attitude should be: I’m going to sew a straight line, not a perfect mile-long highway at daybreak. Simple as that.
First, check your setup. Your needle should be sharp and brand-new-ish. A dull needle fights you and makes things wander. Your feed dogs should be moving smoothly, not squeaking or sticking.
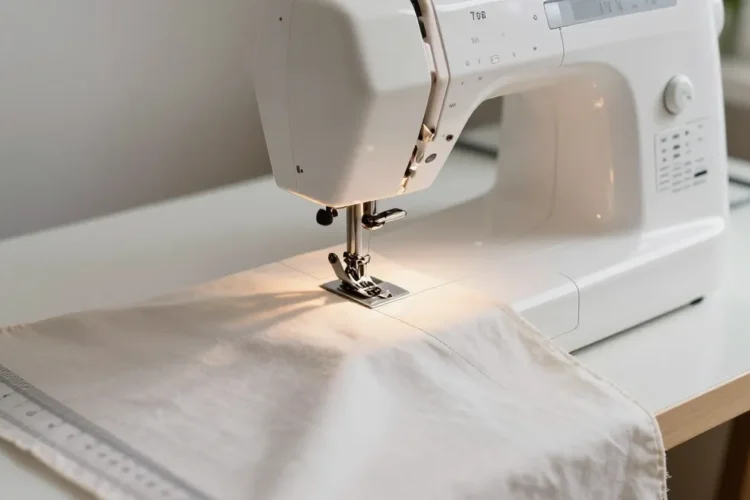
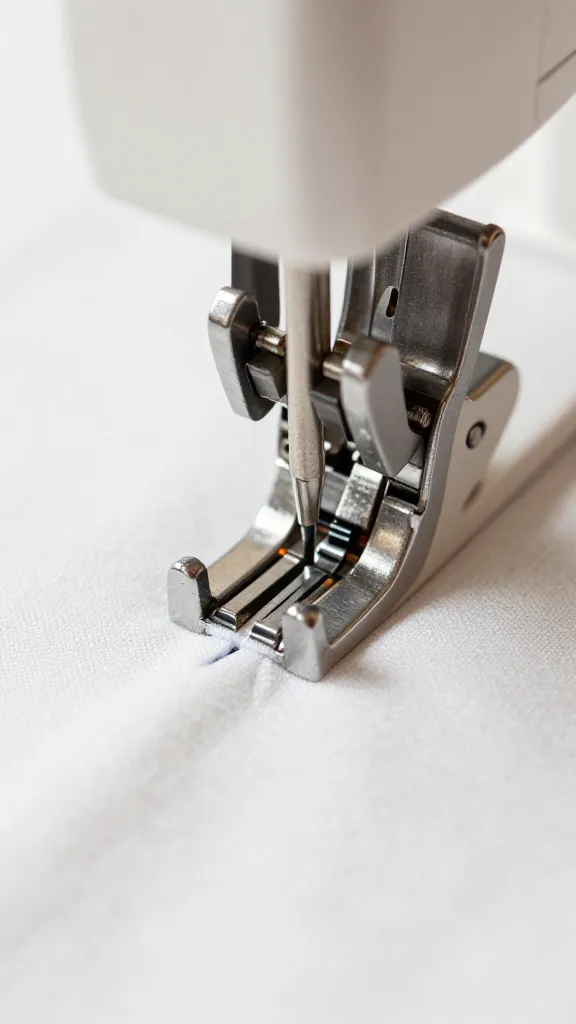
Thread tension should feel balanced—no loopy top stitches or wobbly bottoms. The right tools matter. A good straight stitch requires a good straight stitch foot (the single-guide foot). Some folks love a walking foot for tricky fabrics; others prefer a standard foot for crisp cotton. Its guide or edge-stitch foot can help you ride a line, but we’ll get to that moment later.
Prep like a champ: press, align, and mark
I know, I know—pressing sounds boring. But a crisp fabric is a confident fabric. If your fabric puckers, your seam will too.
– Iron your fabric before cutting. Heat up the crease lines.
– Use a washable fabric marker or tailor’s chalk to mark your stitching line.
– Align the edge with a straight ruler or use the needle as your reference point. Your aim is a calm, parallel journey, not a random zigzag across the map.
Pro tip: press seams to one side after you sew. It helps reduce bulk and keeps things neat. And yes, you’ll press between steps—you’re not cheating; you’re saving you from future headaches.
How to guide your fabric like a pro
Straight sewing boils down to how you guide the fabric. Not tugging, not pulling, just a steady, patient push.
– Sit tall and relaxed. Your hands should float near the needle, not at the edge of the world.
– Let the machine feed the fabric, not the other way around. If you feel the fabric bunching, slow down.
– Use a gentle, even pace. Think “driving on a smooth highway,” not “racing a getaway car.”
If your line starts drifting, stop and recheck. It’s rarely the machine’s fault; it’s usually the fabric or the alignment. The biggest culprit is too much speed with not enough steadiness. Ease into it.
Tools that help you stay true
Some tiny gadgets can save you from a lot of crooked drama.
Edge guides and seam guides
– An edge guide attaches to the presser foot and helps you keep a consistent distance from the edge.
– A seam guide marks your seam allowance so you don’t drift into the unknown. Use 1/4″, 3/8″, or whatever your project demands.
Stabilizing fabrics and layers
– Interfacing or stay tape can prevent stretchy fabrics from wandering.
– For slippery fabrics (silk, satin), a spray starch or starch alternative can help maintain grip.
– Multiple layers? Pin or clip in staggered spots, then remove pins as you sew. You don’t need a full-body shield, just a plan.
Common mistakes and how to avoid them
Let’s crush those sneaky traps that turn your straight line into a wobbly confession.
– Pulling fabric: Your hands should guide, not fight. If you see the fabric pulling ahead, pause, realign, and resume slowly.
– Uneven feeding: Check that the feed dogs are engaged and that you’re not gliding the fabric sideways with your hands.
– Needle deflection: If your needle hits the fabric and wanders, you might be hitting a thick seam or using a dull needle. Change needle and try again.
– Inconsistent speed: A steady, calm rhythm beats a sprint every time. Take a breath, then sew.
Practice bites-sized, measurable progress
Practice makes confident, not perfect—so set tiny goals and celebrate.
– Start with a scrap sampler: mark a straight line and sew 10 inches, then 20, then 50. Note where you drift.
– Try different fabrics: cotton, muslin, light denim, jersey. Each fabric has its own personality and needs.
– Use a straight line guide for the first 10 projects if you want a safety net. Then gradually wean off the guide as your muscle memory grows.
Progress check-in
– After every session, press your seams and measure your accuracy. If you’re consistently off by more than 1/4″, adjust your setup or check your needle type.
– Ask a friend to watch you sew for a minute. Fresh eyes catch small drift you might miss.
When to lean on technology
Machines aren’t the villain; they’re your sidekick. Use their features to reinforce straight lines.
– Use a straight stitch with a consistent stitch length. Most machines default to a decent 2.5–3.0 mm stitch length for seams.
– Some machines have a laser line or a built-in guide. If yours does, align with it and pretend you’re piloting a spaceship.
– Lock stitches at the start and end. Don’t skip those backstitches; they keep your line from wandering when you start and stop.
– Foot pressure matters. If your fabric feeds too loosely, adjust your presser foot pressure or use more pins to hold it steady.
Advanced tricks for real-world sewing projects
You’ll hit projects where you need more finesse than “keep it straight.” Here are some go-to tricks.
– Seams that meet perfectly: Measure twice, sew once. If you’re joining edges, sew with your edge aligned to the guide, not just guessing.
– Top-stitching: A straight line on the top looks crisp. Practice with scrap fabric first.
– Quilting straight lines: Use a walking foot and a quilting guide for evenly spaced lines. It’s like an adult coloring book with thread.
Common Questions
Why does my seam drift even when I think I’m going straight?
Sometimes it’s as simple as fabric tension or needle choice. Check that you’re using the right needle for your fabric (fiber, weight, and weave all matter). Ensure the bobbin thread isn’t too tight or loose. If in doubt, rethread both top and bobbin with fresh thread.
Can I sew straight without a walking foot?
Yes, you can. A walking foot helps with slippery fabrics and multi-layer projects, but you can still sew straight with a standard foot by guiding patiently and using guides or markers. If you notice slippage, try positioning the fabric more firmly or reduce speed.
What if my fabric keeps bunching or puckering?
Puckering usually means tension or needle issues. Check top and bobbin tensions, swap in a fresh needle of the correct type, and consider using a smaller stitch length for crisp fabrics. Also, ensure you’re sewing with flat, evenly pressed fabric rather than a wrinkled surface.
How do I fix a crooked line in the middle of a project?
Stop, unpick just enough to reveal the error, realign, and resew from the last good point. If you catch it early, you won’t need to rejoin big chunks. Take a breath—hand tension matters as much as machine tension.
What fabric is easiest to practice your straight-line skills on?
Muslin and cheap cotton are fantastic starting points. They behave predictably, don’t slip as much, and don’t break the bank if you screw up a few lines. Once you’re confident, move to the fabric you’ll actually use in projects.
Conclusion
You don’t require a special skill to sew straight, do a little prep, have calm pace, and smart use of guides and feet. Practice with intention, stay relaxed, and your stitches will stop looking like chaotic spaghetti and start looking like clean, confident lines, you’ve got this. The more you practice, the more your seams become second nature—no psychic powers required. Now go grab that scrap fabric and sew it straight, friend.
0 Comments