The edges of fabric have a cruel sense of humor: they curl, fray, and mock your perfectly planned project. But you don’t have to roll your eyes and reach for the seam ripper every time. Here are 10 practical, friendly ways to keep those edges tidy and drama-free.
1. Hem it neatly from the start
You’ll be amazed how a simple hem can save you a world of frayed nerves. Folding the edge twice and stitching close to the fold creates a sturdy, clean finish. If you’re feeling fancy, a narrow rolled hem or a baby hem works wonders on lightweight fabrics. FYI, a well-pressed hem tends to stay put and resist stray threads like a champ.
2. Use the right seam finish for the fabric
Different fabrics behave differently, so what’s good for cotton might be a disaster for chiffon. Here are quick options:
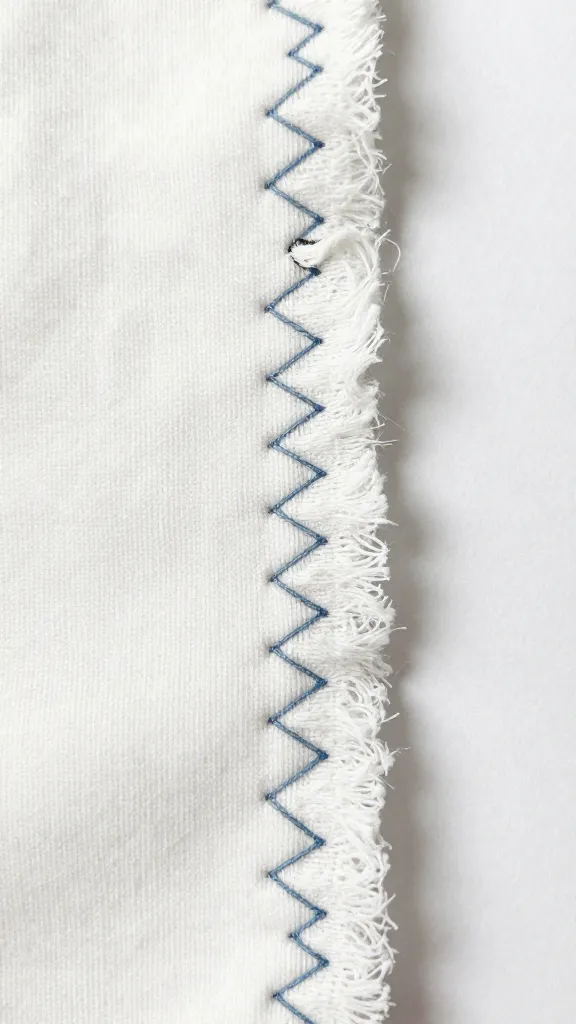
- Overlock/Serger edges for knit fabrics and woven fabrics that tend to ravel.
- Zigzag stitch on a regular machine as a budget-friendly fray guard.
- Pinked edges for light-weight fabrics where you don’t want bulky seams.
What’s your fabric saying? Listen to it, and give it the finish it deserves.
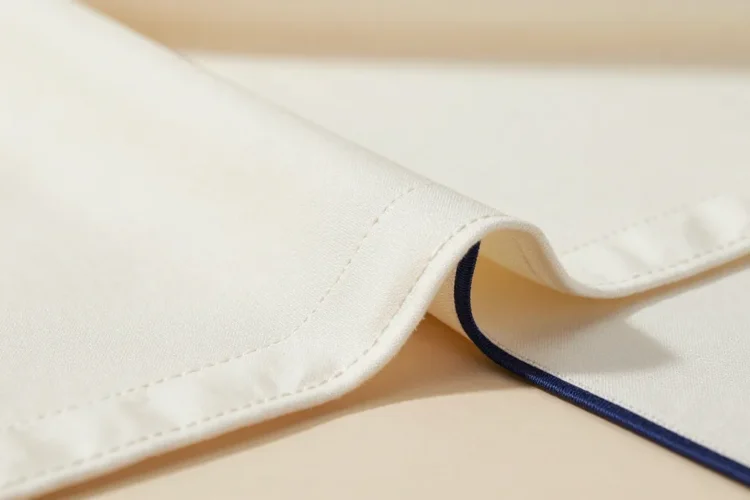
3. Try seam binding or bias tape

Bias tape is like a spa day for raw edges. It wraps the edge with a neat, finished look and adds a tiny bit of strength. You can choose a matching color or a bold contrast for a design moment. If you don’t have bias tape handy, a simple fabric strip can work in a pinch—just add a stitch or two to hold it in place.
4. Apply fray-prevention products
Yes, there are sprays and liquids that stop fraying in its tracks. A quick dab on raw edges before finishing can dramatically reduce unraveling. Pro tip: test on a scrap first to avoid sticky surprises or discoloration. IMO, a light hand is key—you’re trying to tame edges, not glue them into oblivion.
5. Fold and pin strategically for clean edges
Sometimes the simplest trick wins. Fold edges evenly, then pin every 1–2 cm (about 1/2 inch). A sharp iron press between folds helps set the edge and keeps the line straight. Pro move: press, not just iron. Your fabric will thank you when you sew along a crisp guide.
6. Learn a few edge-finishing stitches

There are a handful of stitches that do the heavy lifting without drama. Consider:
- French seam for sheer or light fabrics where you want a clean inside finish.
- Flat-fell seam for a rugged outdoorsy look that holds up to wear.
- Serge edge with a decorative topstitch for a modern, sturdy finish.
If you’re new to these, practice on scraps of the same fabric. You’ll thank your future self when you cut into that project and it behaves.
7. Upgrade your sewing machine needles
Needle choice matters more than you’d think. A dull or wrong needle tugs fibers and invites fray. For woven fabrics, use a sharp needle (maybe a 70/10 or 80/12). For knits, a ballpoint or stretch needle keeps threads happy. FYI, changing needles often—especially after a lot of projects—keeps edges sleek and stops burrs from forming.
8. Finish with a clean edge on tricky fabrics
Some fabrics are stubborn: polyester blends, silk, or boucle can fray like there’s no tomorrow. A few tailored tricks help:
- Use interfacing near the edge to stabilize fatigue-prone areas.
- Apply a fray check product before seaming for delicate fabrics.
- Use a cover-stitch or twin needle for hems on knits to avoid curling.
If something behaves badly, don’t force it—switch techniques and give it a breather.
9. Reinforce corners and edges on rough spots
Flat edges aren’t the only thing to watch. Corners and corners of pockets or hems often fray first. A quick bar-tack at the start and end of seams can help hold everything in place. For extra protection, sew a short line along the edge before finishing the seam, especially on heavy fabrics. It’s like giving your project a tiny insurance policy.
10. Block or wash fabrics to set the finish
Sometimes all edges need is a little post-sewing patience. Wash or steam lightly to help fibers settle. Blocking is especially useful for woven fabrics that tend to stretch or warp after finishing. It might sound boring, but the payoff is clean, stable edges that stay put after you wear or wash the garment.
Bonus deep dive: Quick fixes for fraying after the fact
If you already see threads pulling or small frays, here are speedy solutions:
- Seal with fray-prevention liquid and let dry completely before laundering.
- Top-stitch a safety-friendly edge to keep fibers contained.
- Trim frayed threads close to the edge and re-finish with a light zigzag or overcast stitch.
Why edges behave differently across materials
Fabric type dictates how you should treat edges. Natural fibers like cotton tend to fray with a mind of their own, while synthetics may melt or shed threads under heat. Always test on a scrap before you commit. It saves you from accidental drama and a ruined project.
Quick checklist before you sew
– Choose the right needle for your fabric.
– Pick a finish that suits the weight and weave.
– Press edges before stitching for accuracy.
– Use a clean, sharp pair of fabric scissors to cut edges (no jagged corners).
– Do a quick stitch-test on scrap to confirm tension and stitch length.
Common Questions
How do I stop fraying on already-cut fabric?
Trim any loose threads, then apply fray check or a light seam sealant. Let it dry completely before finishing. If you’re worried about stiffness, test on a scrap first to ensure it won’t alter the hand of the fabric.
Can I use fabric glue to prevent fraying?
Fabric glue can work for hems or patches, but it’s not a substitute for proper seam finishes in most cases. It’s great for temporary fixes or or non-washable projects, but for longevity, rely on stitches or bias tape.
Is it worth using a serger just for edges?
If you sew a lot or work with fabrics that fray fast, yes. A serger gives you a clean, durable edge in one pass. If you don’t have one, you can still get perfect results with zigzag stitches or French seams.
What about fraying in garments that won’t be washed often?
Even if you don’t wash a garment frequently, edges can still loosen due to wear and friction. Finishes like bias tape or a neat hem can prevent ongoing edge deterioration from daily use.
Do fray-prevention sprays affect fabric color?
Most don’t, but some may leave a slight residue on darker colors. Test on a hidden scrap to be safe. If you notice any color shift, switch to a different product or approach.
Conclusion
Edges don’t have to be a melodrama. With a handful of smart finishing tricks, a few quick tools, and a dash of patience, your fabric edges stay neat, sturdy, and ready for action. So pick your method, give your edges a little love, and sew like you mean it. You’ve got this—and your future projects will thank you for the extra care.
0 Comments